Instance Creation
-
To create an instance, click on the
New Instancebutton.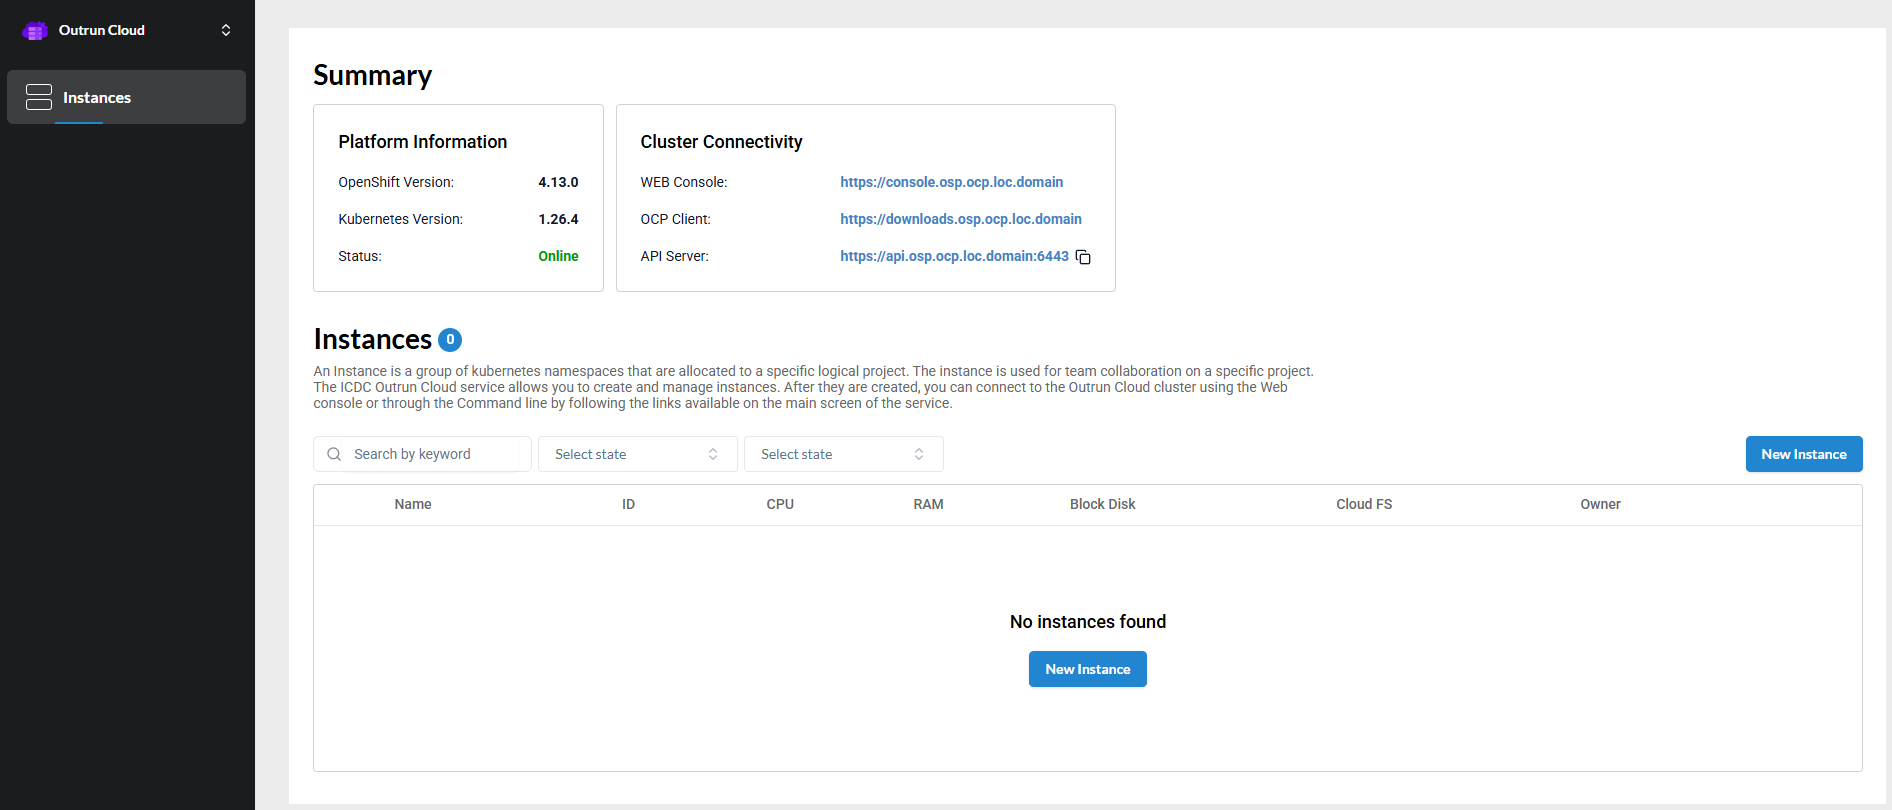
-
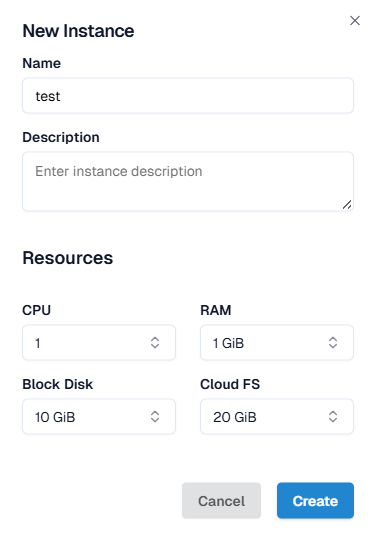
In the modal window that opens, enter the following information:
- Instance name;
- Description (optional);
- CPU and RAM values;
- Type and size of disk space (optional):
- Block Disk (Ceph RBD)
- Cloud FS (CephFS)
-
Click
Create.Next, you can add the Outrun Cloud namespace to the created instance.

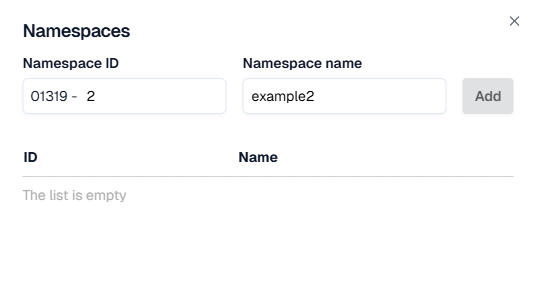
When adding or creating a namespace(s) in an instance, these namespaces are
Outrun Projectsin the Outrun Cloud console: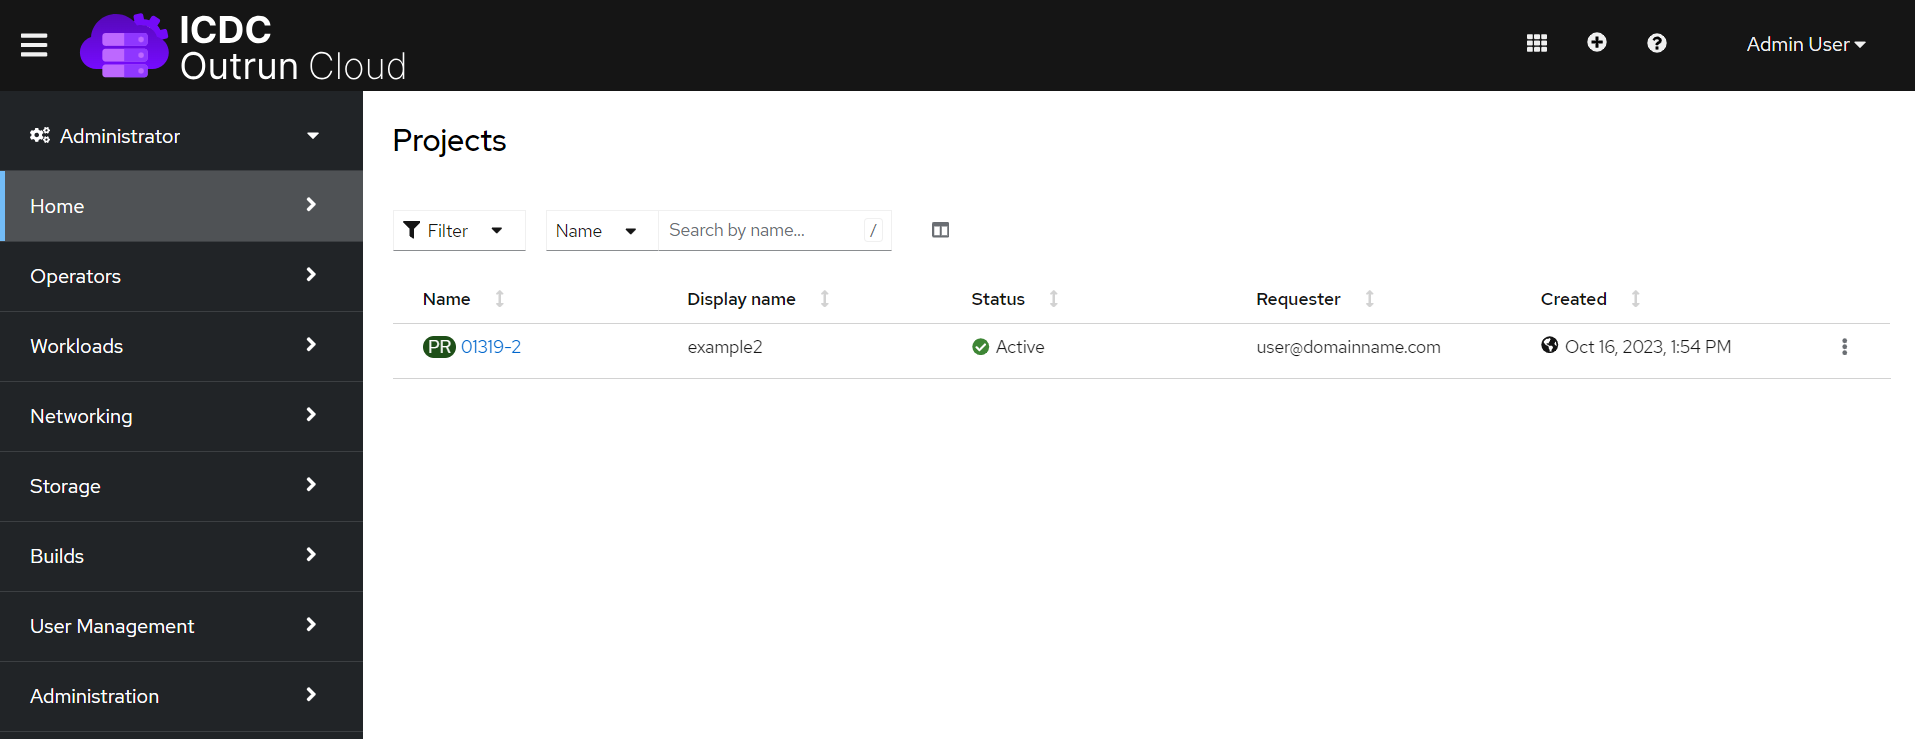
The created instance will be displayed in the
Instancesblock.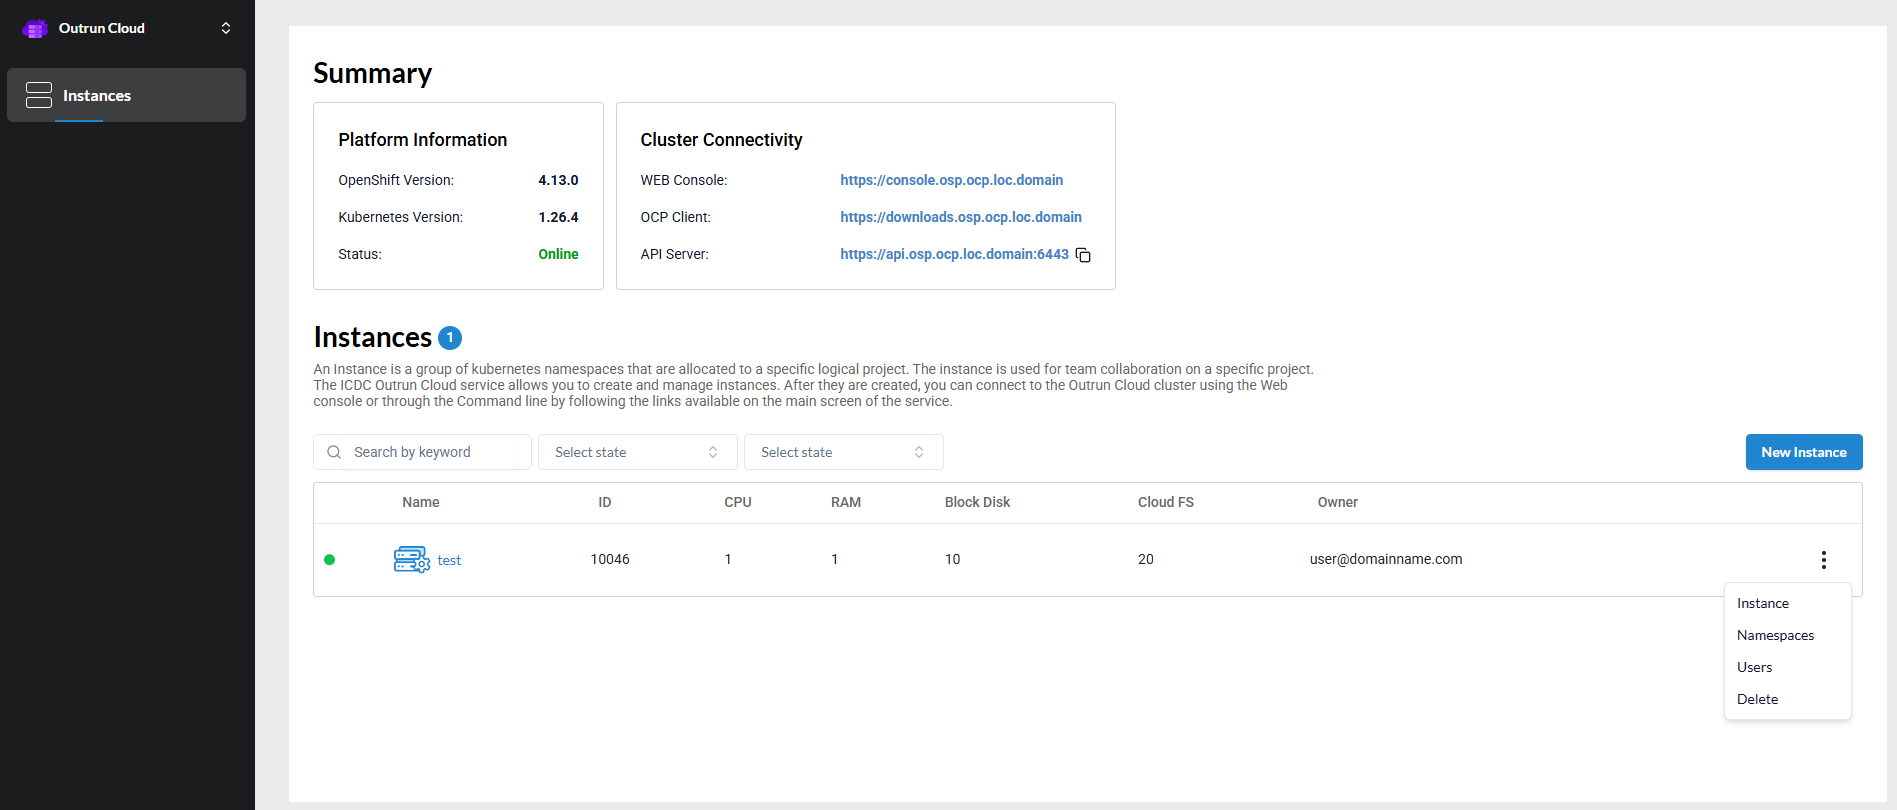
From the side menu of each instance, you can perform the following actions:
- manage instance (add/remove) users - get access to namespaces (groups of Outrun Cloud projects);
- manage instance (add/remove) names;
- manage resources (edit) and instance details;
- delete an instance (please note that this is an irreversible action).
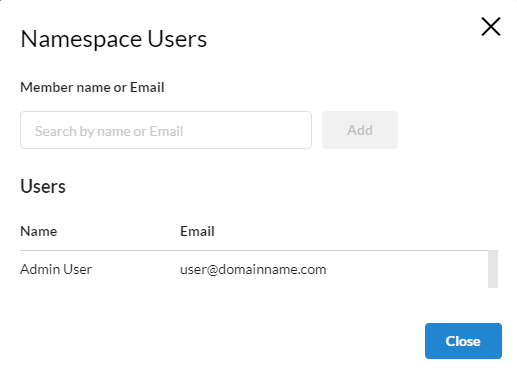
Adding a user to the instance
To add a user to an instance, click Users in the side menu of the created instance. In the modal window that opens, you need to enter the user's name or email and click Add.
Outrun Cloud cluster Connection
Web console
To connect to the Outrun Cloud cluster using the web console, follow the link provided on the main screen:

Command line client (CLI)
To connect to an Outrun Cloud cluster using the command line, follow these steps:
-
Click on the link indicated on the main screen to download the client corresponding to your operating system:

-
Next, connect to the API server using the following command::
oc login <API Server> --username <User ID>
Roles and Permissions
| Action | Member | Admin | Owner | Operator |
|---|---|---|---|---|
| Create Instance | ✔ | ✔ | ✔ | ✔ |
| Outrun Cloud cluster connection | ✔ | ✔ | ✔ | ✔ |
| Manage (or edit) instance users | ✔ only own | ✔ | ✔ | ✔ |
| Manage (or edit) instance names | ✔ only own | ✔ | ✔ | ✔ |
| Manage (or edit) resources details | ✔ only own | ✔ | ✔ | ✔ |
| Delete Instance | ✔ only own | ✔ | ✔ | ✔ |