Brokers
A message broker is a software component that acts as an intermediary between various components of a distributed system.
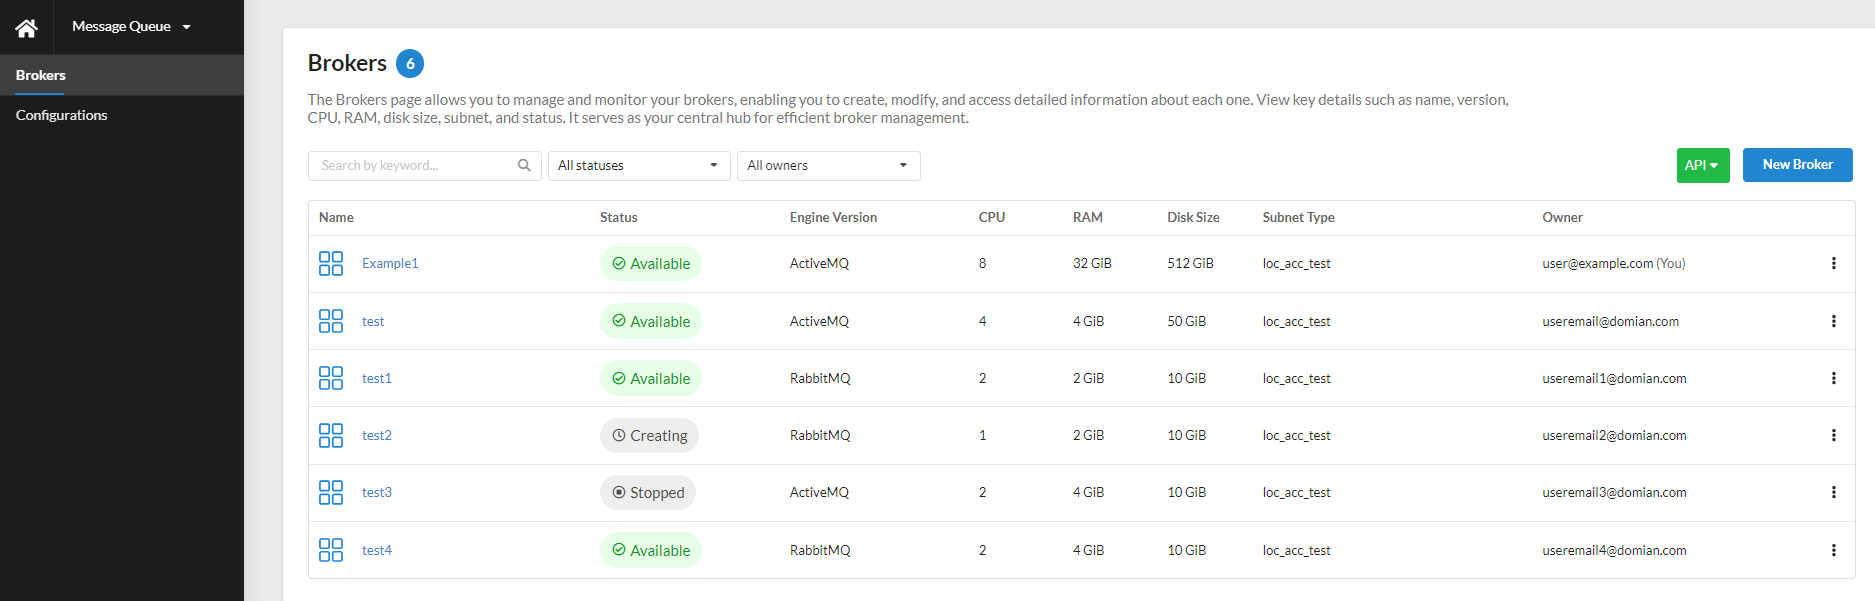
Brokers can be created and modified using ICDC Message Queue API operations or the Brokers tab.
Using the sidebar menu, the user can edit and delete brokers.

Brokers statuses
Depending on ongoing processes, brokers can have different statuses:
| Status | Description |
|---|---|
Creating |
the broker is being created (during its creation, the broker is unavailable) |
Stopped |
the broker instance has been stopped |
Deleting |
the broker is being deleted |
Available |
the broker is healthy and available |
Maintenance |
ICDC Message Queue is applying a maintenance update to the broker |
Modifying |
the broker instance is being modified based on the client's request |
Starting |
the broker is starting up |
Storage-full |
the broker has reached its storage capacity allocation limit. This is a critical status, and if it occurs, it is recommended to resolve the issue immediately. To do this, you need to increase the storage scale by changing it in the broker settings. |
Broker creation
To create a broker, follow these steps:
- Go to the
Brokerstab; - Click
New Broker; -
In the modal window, fill in the information necessary for creating the broker.
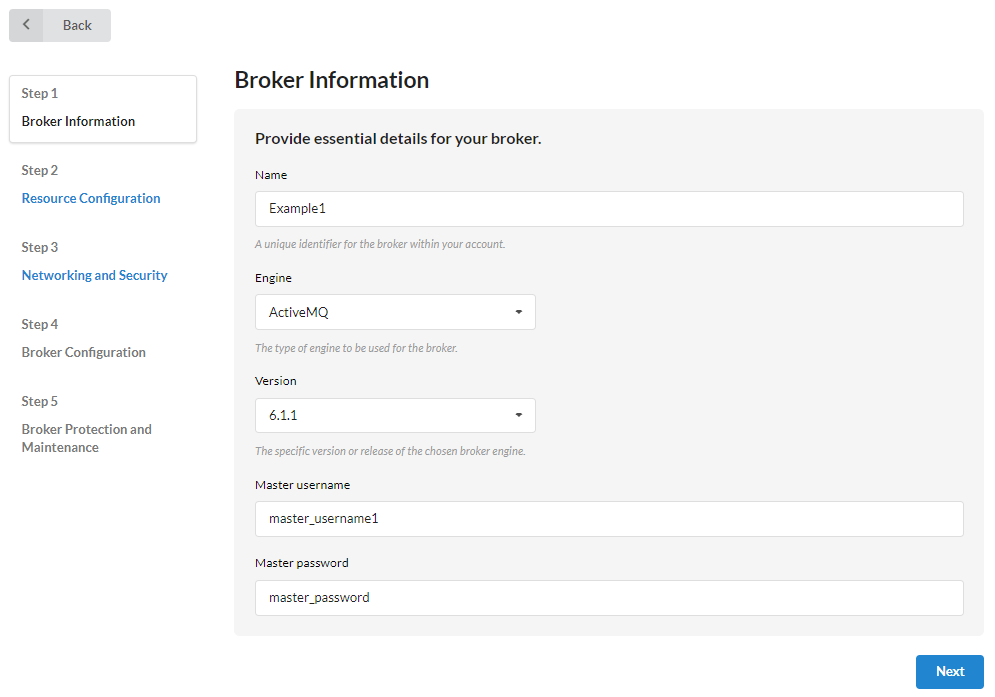
Broker Information:
Nameof the broker in the account;Engine- select the engine for the broker being created (ActiveMQ/RabbitMQ);Version- select the version/release of the chosen broker engine;Master username;Master password.
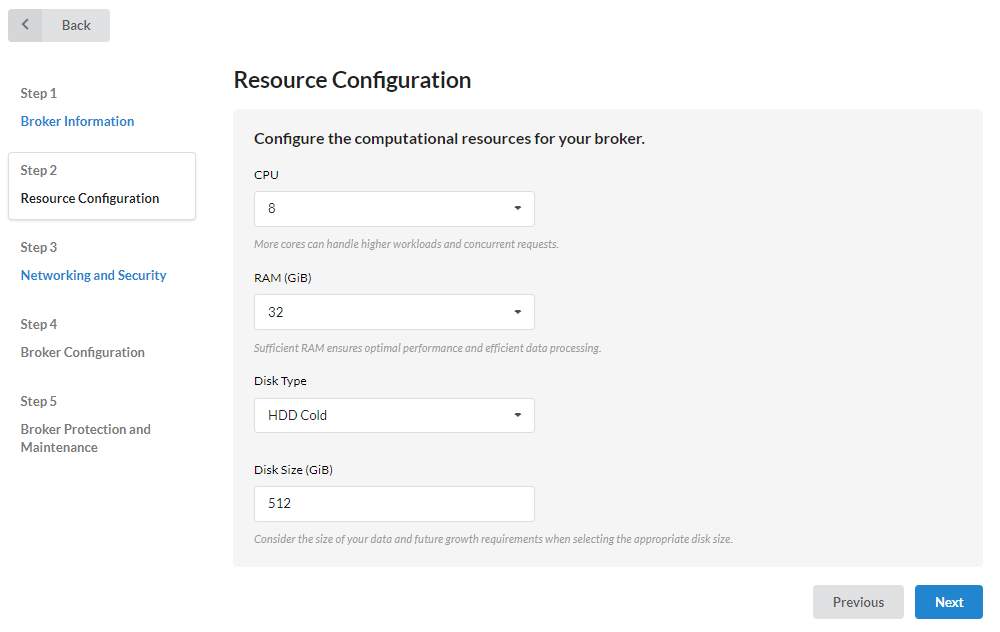
Resource Configuration:
CPU- number of CPU cores for the broker;RAM- amount of RAM allocated for the broker;Disktype;Disk size- storage volume for the database.
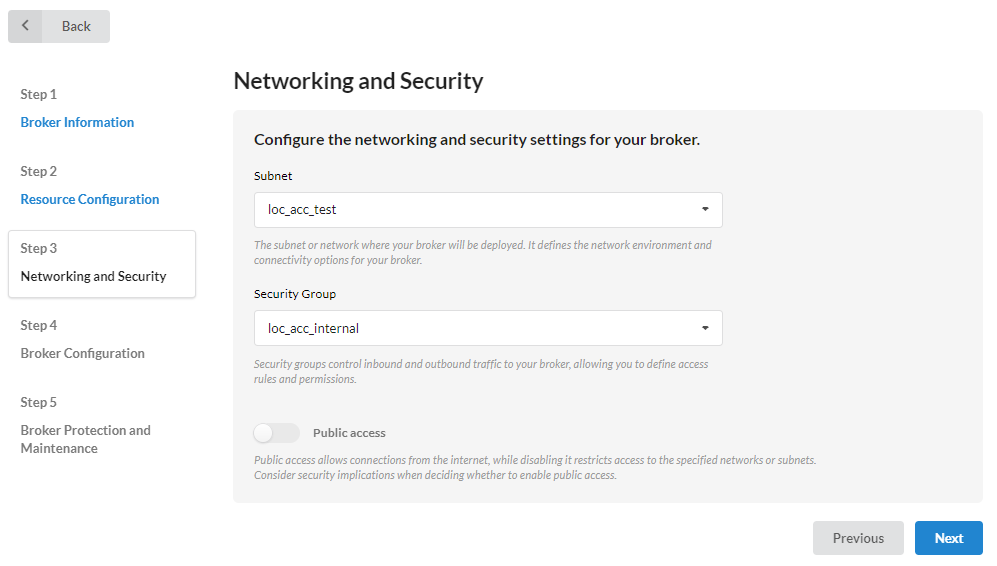
Network and Security:
Subnetor network in which the message queue broker will be deployed. This determines the network environment and connection parameters for the broker.Security groupfor the broker. Security groups manage incoming and outgoing traffic for the broker, allowing you to define access rules and permissions.
The user can also select
Public accessfor the broker. Public access allows connections from the internet, and disabling it restricts access to specified networks or subnets.Public access
Take security measures when deciding to enable public access.
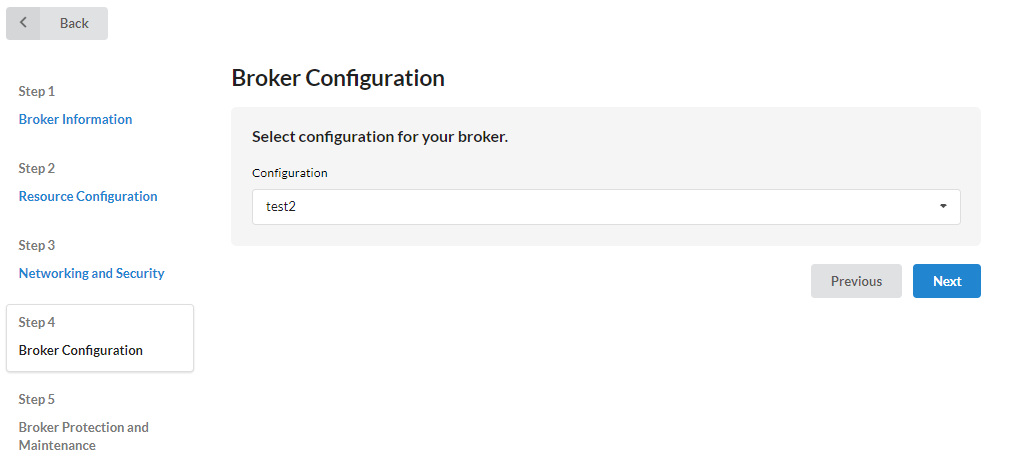
Broker Configuration: At this step, you need to select a configuration for the broker being created.
New configuration
If a specific configuration is required for the new broker, create a new configuration in the
Configurationstab before creating the broker.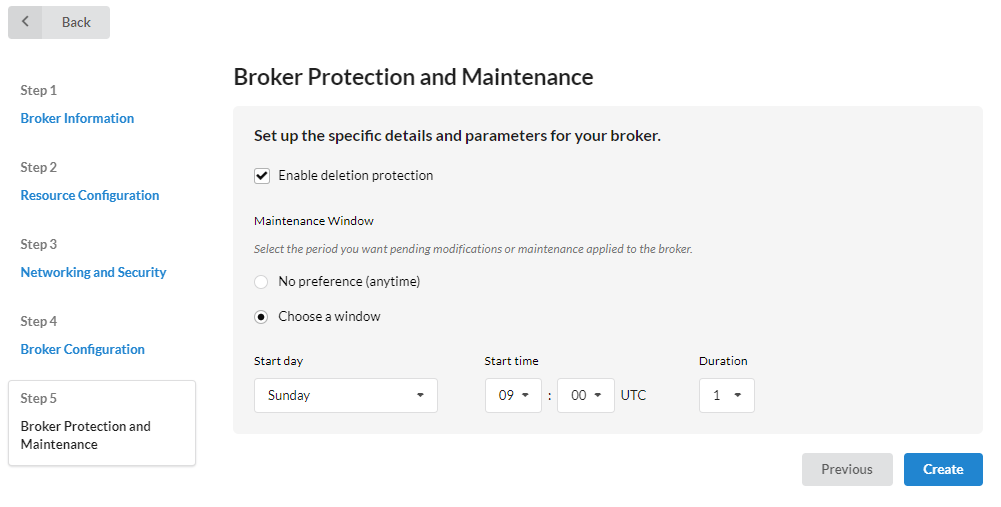
Broker Protection and Maintenance:
Delete protection- when the broker protection is selected, it cannot be deleted without editing this parameter;Maintenance window- the period during which scheduled changes or maintenance will be applied to the broker.
-
Click
Create.
The created broker will be displayed in the Brokers tab.
After clicking on the created broker, the user has access to a summary of broker information with details.
The Stop button to pause the broker's operation is available only when the broker status is Available. If the broker has a Stopped status, the Start button will be available to resume the broker's operation.
The user can edit the broker by clicking the Edit Broker button. Deleting the broker is also available using the Delete button.
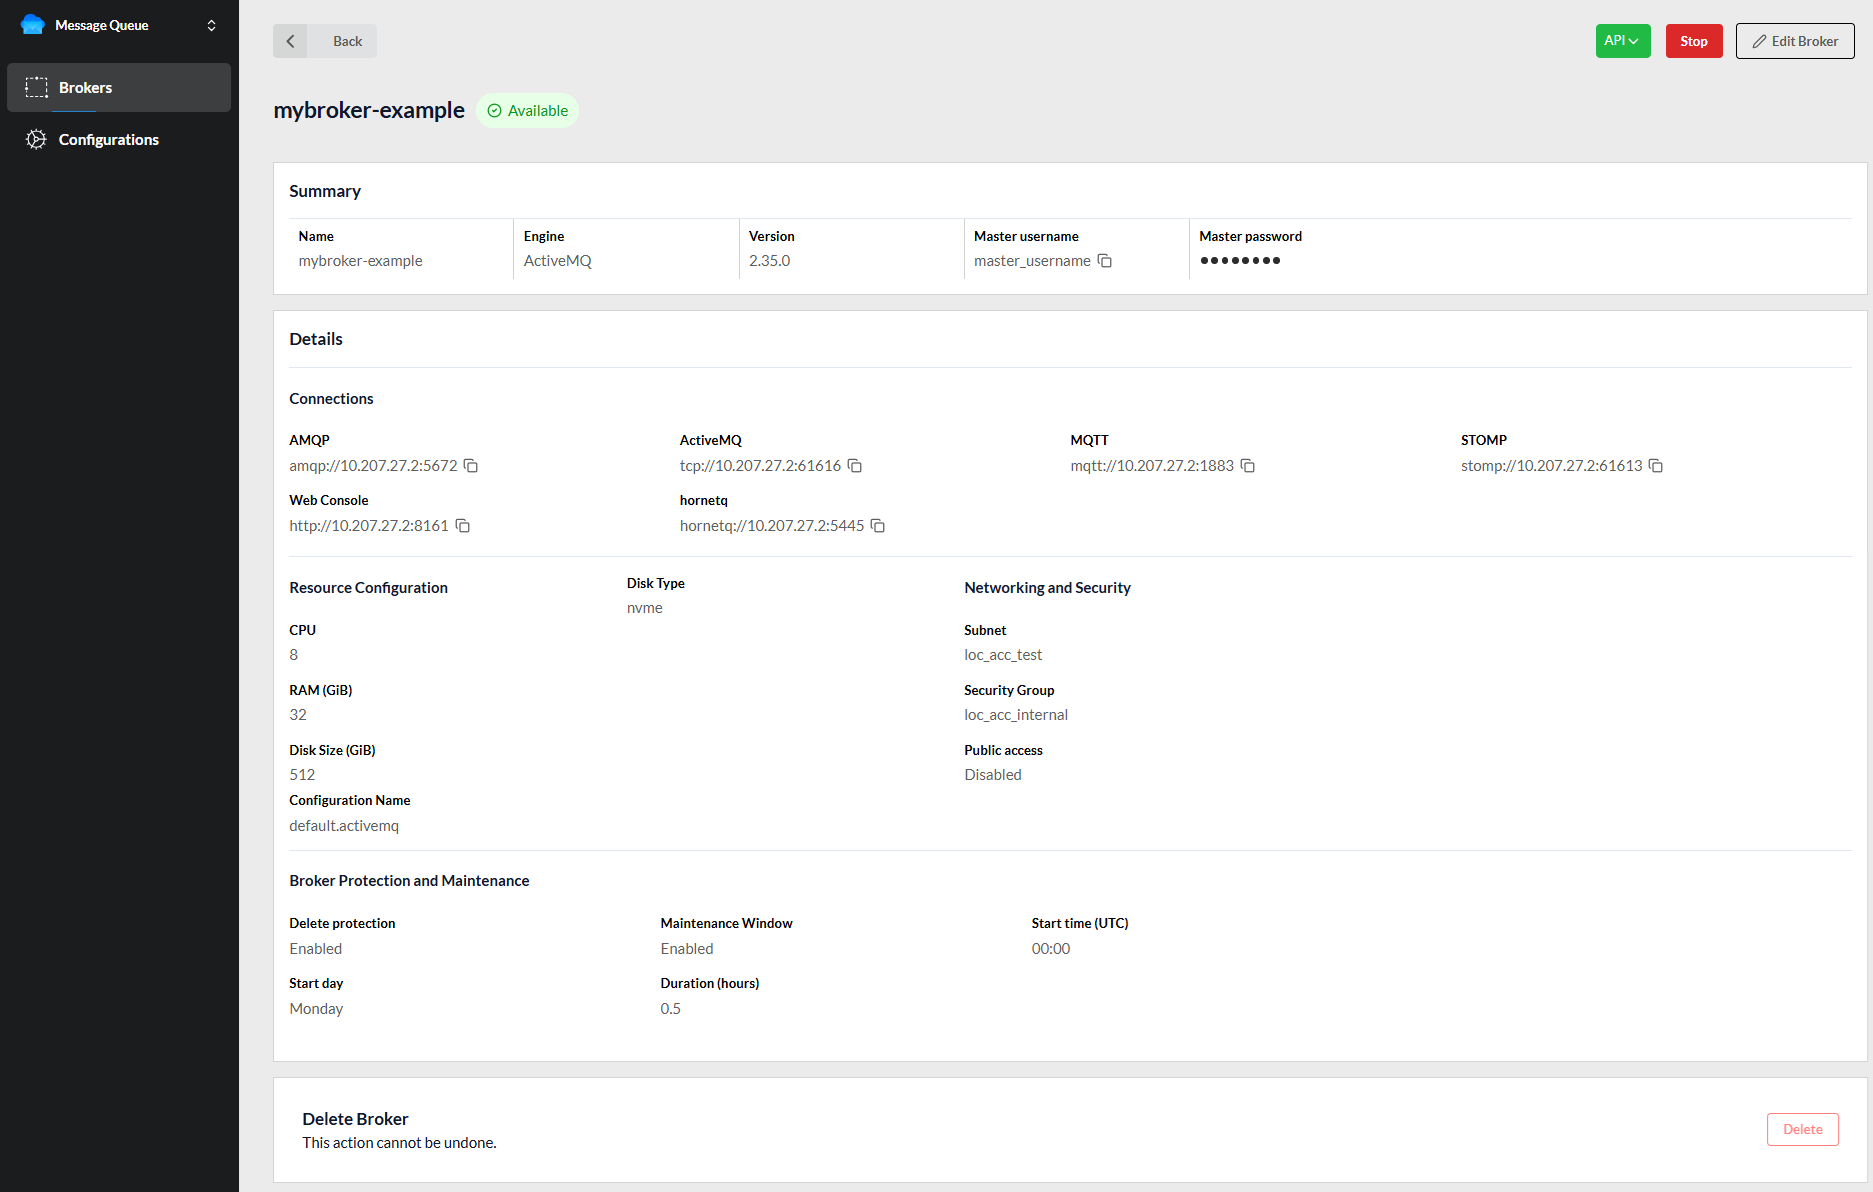
An irreversible action
Delete action is irreversible.
Roles and Permissions
| Action | Member | Admin | Owner | Operator |
|---|---|---|---|---|
| Create Broker | ✔ | ✔ | ✔ | ✔ |
| Edit Broker | ✔ only own | ✔ | ✔ | ✔ |
| Stop/Start Broker | ✔ only own | ✔ | ✔ | ✔ |
| Delete Broker | ✔ only own | ✔ | ✔ | ✔ |